April 27, 2013

Magazine Tiled Table Top

I inherited a small three legged side table that is meant to have a floor length table cloth draped over it. This is not an acceptable kind of decor in my house. Table cloths? Floor length? Should I put plastic over the couches too? The table is rather ugly without a table cloth anyway. No wonder. So I took off the legs and gave it a wider stance. The legs were positioned so they wouldn't be seen beneath the cloth. It was still ugly with the legs widened but I will address that later.
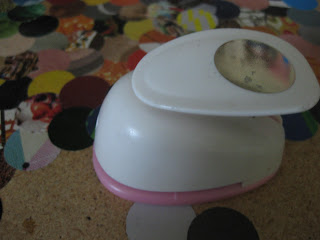
Circle cutter! It punches 1" circles out of paper.
At my handy Micheals Craft Store I got a circle punch to make my Magnet Glass Beads and thought it would do well to tile the table top with colorful circles of magazine pages. I decided to got with an orange and blue-green theme to match my front room. You can pick any color theme or go with random and let the magazine collage speak for itself. A cohesive color scheme though is sweet on the eye. Think Rainbow, pastel, primary, text only, whatever floats your boat.

Then I got to work punching out hundreds of circles from pages in my zillions of magazines. Wired magazine particularly has some good colors and photos to punch circles in. Also for the more girly-girl in you, Vogue has TONS of fabrics and model ads for that haute look. Plus one magazine is HUGE!
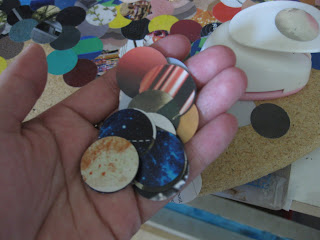
Handful of circles.
You can use Modge Podge for all your crafting collage paper glue needs, but I prefer a good Matte Medium (which I use when painting in acrylic) It dries matte and is essentially a more expensive Modge Podge, I suppose. I just have a vat of it so I use it for everything.

When you glue the magazine circles, use a paint brush and don't over glue it! A thin coat is fine. Then place a clean piece of paper over it and smooth ot the wrinkles and excess goo. A good practice of collage artists everywhere. Keep it neat.

Just fill in the entire table, board, what-have-you and viola! A furniture piece/conversation piece. When I am done doing any paper collage craft on wood I always give it a finish with spray shellac. Shellac is for wood, so it has a yellowish tint in the end. You can always get a clear coat acrylic finish that has no tint, but I find sometimes it comes out tacky. The ultimate, best finish you could ever use is a beautiful RESIN finish. But be careful and do it outside, it's very toxic! Remember, don't die from your craft!
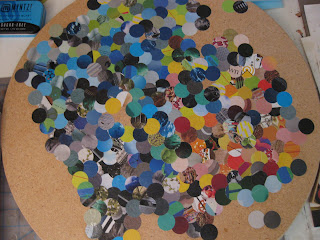
Table top is ALMOST complete! Aaaaagh so many circles!


September 18, 2011

Magnet Glass Beads

I know tons of crafters make these, I see them all around, but that doesn't mean that making them isn't a great present for a friend. And easy too! Once again using scrapbook paper that has cute designs, I cut out little circles and Mod Podge them face up to the glass beads with glitter glue and glue a magnet on the back! Instant birthday present!

September 17, 2011

Custom Oil and Vinegar


Above: Bottles masked and sprayed.
Middle: Finished bottles await being filled.
Below: Final bottles filled and ready to cook.

Frosted Glass Finish. This spray full of frost for glass is an awesome way to design customized glass jars. I save jars all the time and labeling them with their contents is a fantastic way to get brand names out of the kitchen. Especially if they are not stored behind cabinet doors.

Today, I decided to customize some oil and vinegar bottles I picked up from the store. They happened to be $4 from Cost Plus! What a steal! Hopefully they wont drip every where. If they are cheap.

I started by taping off the outer edges in a rectangle. You can buy pre-cut litters with adhesive backing, but I wanted to cut out my own letters from tape. That way I wasn't running to the store again. I like to try to keep it cheap. Then I pasted my cut out letters within the rectangle on the bottle. I taped off the rest of the bottle so spray wouldn't get all over. Then I went outside to spray a thin coat of frosted glass. It took an hour to dry and still smells like paint after I brought it in to photograph, so I'll probably wait until tomorrow to wash it and add the oil and vinegar.

Finally, they'll be displayed on the little Ikea shelf (for pictures to prop up, but I use for bottles, spices and a timer-picture soon) in my kitchen and used every night I cook. Yum!

Lightswitch Covers


An idea from the Big Ass Book of Crafts: covered lights witch covers! These are featured in my bathroom so all the guests can see how crafty I am. I thought the light switch was so nice, I covered the wall plug next to it so they would match. I used scrapbook paper from the craft store, sine they have such a wide variety of paper designs. The paper was a little thick and the glue need to be a mod podge type of glue, so I sanded the light switch first for a tooth to glue the paper onto. Then I held them as the glue dried. Yeah, with my fingers. When all was done, The Big Ass Book called for clear acrylic spray, but I didn't have any. So I used shellac and it yellowed the mountains. But shellac has such a wonderful sheen! That's why it's for wood. Next time, I might get a liquid resin. But be careful with resin! It is way toxic.

September 11, 2011

Paper Maché? YAY!

http://papermacheblog.com
I bought the Big Ass Book of Crafts a while back and found some good recipe's for paper maché. So, recently I worked on a Horse for the Chico Palio in paper maché but decided my technique could be updated. Our horse was built with cardboard skeleton and wrapped newspaper with final glue and newspaper maché. In a quick search on technique I came across this guy, Dan Reeder (paper maché project pictured) at Paper Maché Blog and Gourmet Paper Mache discovered just how clay-like paper maché can be!
He has a step by step photo blog of many projects he works on. Some of the dragons were beautiful! And he uses a cloth maché for a softer looking finish, which I love the look of. The Big Ass Book of Crafts describes making a paper clay like substance good for soothing and clay like sculpting. I will certainly use this mix of information for my next project in paper maché sculpture.

December 12, 2008

Lorigami


I made this like 6 years ago at school. A ceramic raku origami frog. It lost a leg in the raku process, but I glued it back together (I know not origami-like practice, but it is clay) and it is now high end art on my mother's coffee table.